Course
Courses
- You can create and manage courses.
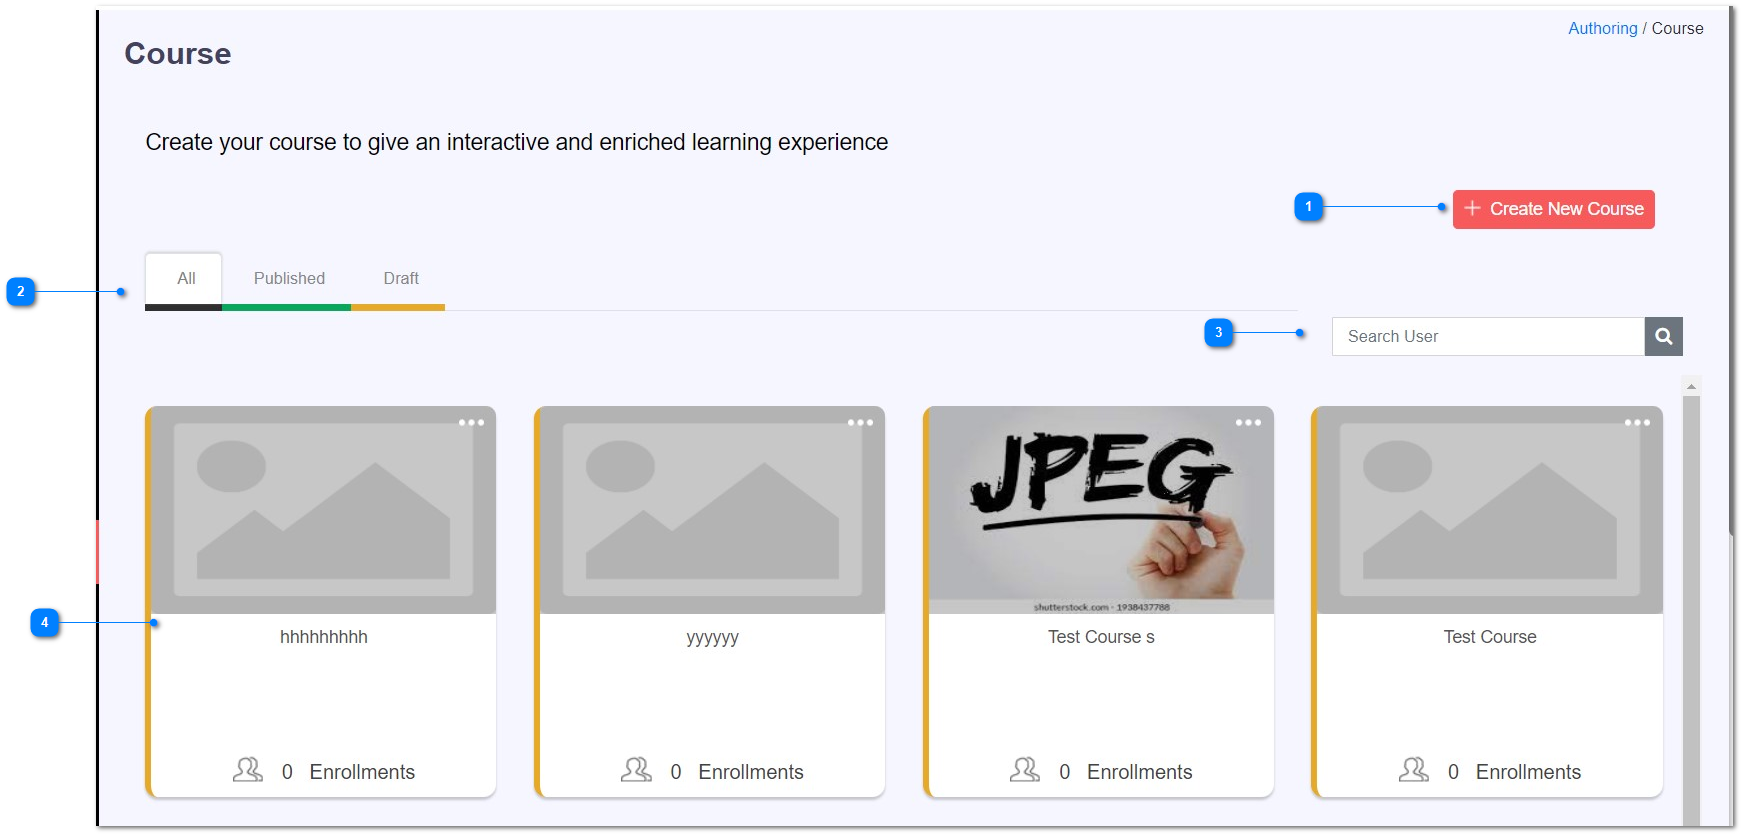
Figure 3 - Course
|
Annotation Number |
Component |
|
1 |
Create New Course |
|
2 |
Status of the courses |
|
3 |
Search Courses |
|
4 |
Published Course |
Table 3 -Course
Create a course
- Click Create button, you will get a screen similar to the following.
- Course creation can be done in Three steps.
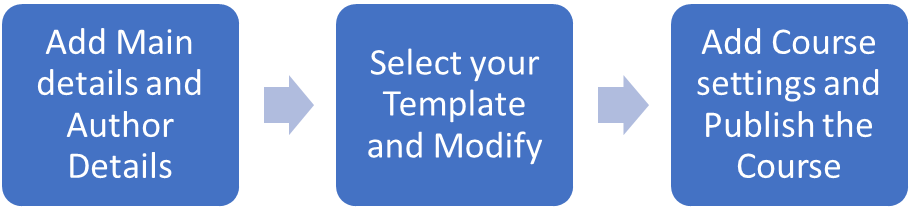
- Step 1

Figure 3.1 -Create Course
|
Annotation Number |
Component |
|
1 |
Set duration of the course |
|
2 |
Name of the course |
|
3 |
Short description of the course |
|
4 |
Extended description of the course |
|
5 |
Back to the Course List |
|
6 |
Banner image upload |
|
7 |
Course thumbnail image upload |
|
8 |
Select Course Instructors |
|
9 |
Save and proceed to Step 2 |
Table 3.1 -Create Course
- Step 2
- In Step 2, you can select a template to create a course.
- The Templates are shown below.
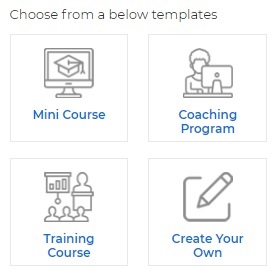
Figure 3.2 -Create Course
- You can click the template most suited to your course. You can see the templates in detail.
a. Mini Course
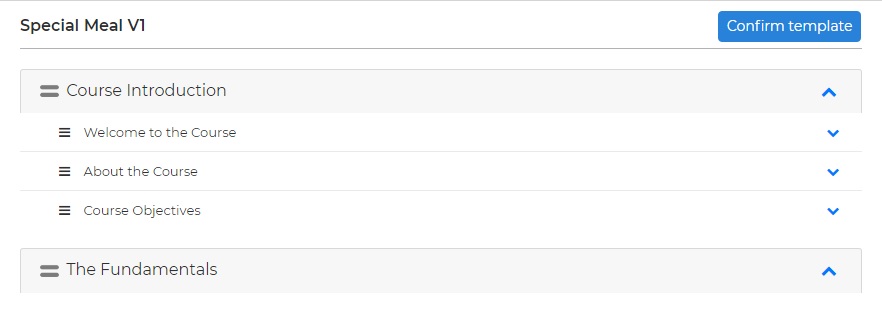
Figure 3.3 -Create Course
b.Coaching Program
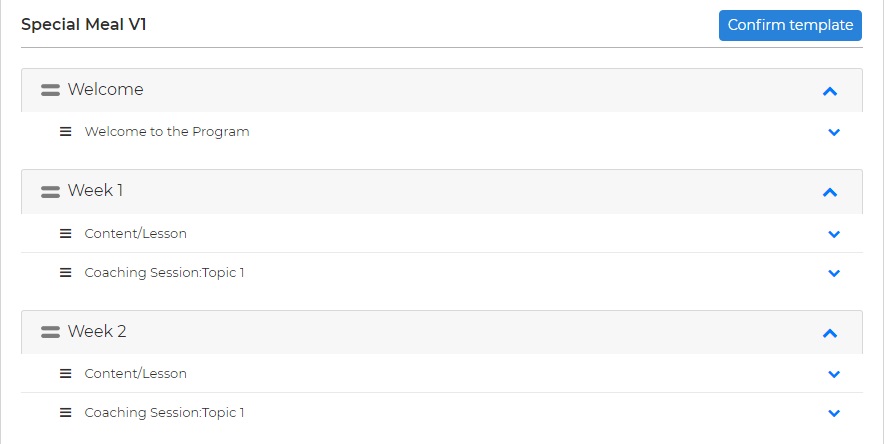
Figure 3.4 -Coaching Program
c.Training Courses
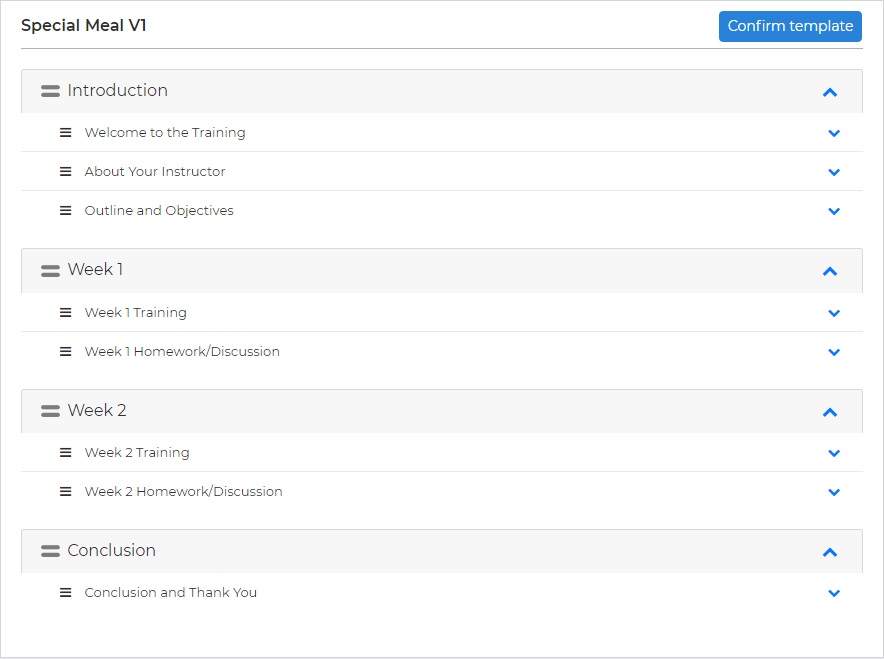
Figure 3.5 - Training Courses
d.Create Your Own, you can use your own structure to make the course, by adding the components in this template, will discuss later in this document

Figure 3.6 -Create Own
- After selecting a template, click “Confirm template” button
To build the course you can use the following components
- Builder, before adding any component
- Add New Lesson and inside the New lesson you added, Add a New Page,
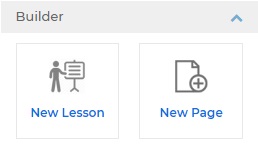
Figure 3.7 -Builder
- After adding a page you will get a screen similar to the following. Click Add More to add the Other Components to the Page.
- You can drag and drop the following components to the added Page, left aligned, Full Width or Right Aligned.
- General Components - Test: You can add text and format
Web Link: You can add link of a web page
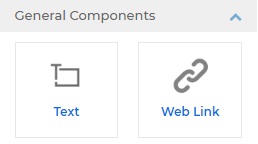
Figure 3.8 -General Components
- Multimedia - Graphic: You can add an image, allowed types- JPG/PNG, Maximum Size: 2 MB
Video: You can add a video, allowed types, MP4, OGG, WEBM, Maximum Size: 500 MB
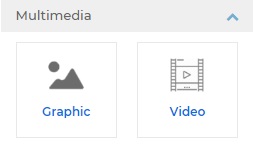
Figure 3.9 -Multimedia
- Questions - Single Choice: Only one answer
Multiple Choice: Many answers
True/False: Select one True or False statement
Short Answer: You can type answers
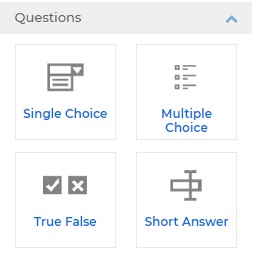
Figure 3.1.0 -Questions
- Documents - Word: You can upload a Word document
PowerPoint: You can upload a PowerPoint file
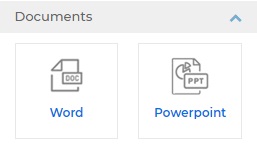
Figure 3.1.1 -Documents
- Authoring Components - E-Learning Content: You can upload SCORM file
Online Exam: You can import an existing exam
Assignment: You can let the learner to upload an answer as Word file, to the given question
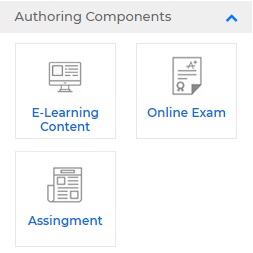
Figure 3.1.2 -Authoring Components
- Step 3
- In step 3, you can change course settings and Publish the course.
Created with the Personal Edition of HelpNDoc: Make the switch to CHM with HelpNDoc's hassle-free WinHelp HLP to CHM conversion tool